A Split Seam, Rejoined by Hand
A small opening along a seam is often a straightforward hand repair. Learn how to check the fabric, match the seam’s path, sew it closed and secure the finish.
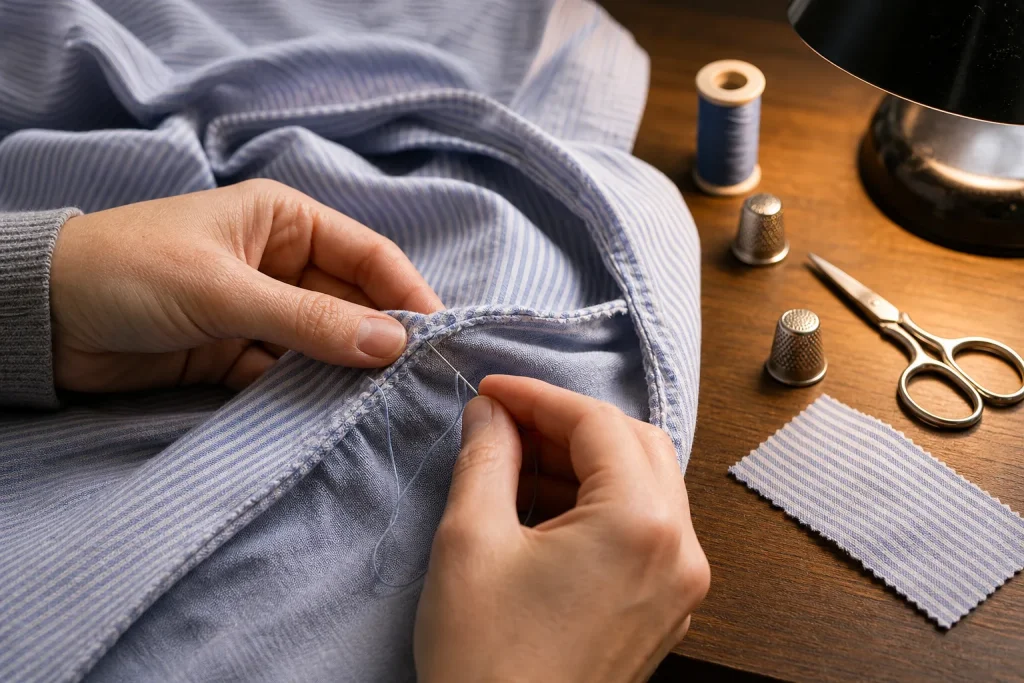
You notice the split when you pull on your shirt: a small gap has opened under the arm, but the fabric on either side is still intact. Set the garment on a table rather than tugging the opening wider. With a needle, matching thread and a little patience, you can usually close a small seam opening by hand while keeping the repair flat and comfortable.
1. Check what has actually come apart
Turn the garment inside out and look closely at the opening. A seam repair is appropriate when the stitches have broken or loosened but the fabric edges are still sound. If the fabric itself has torn through, frayed into loose threads, or become thin and weak, simply sewing the edges together may not hold. That may call for a patch or a different repair.
Gently bring the seam edges together without stretching them. Look for the original stitch holes and the line of the seam allowance: that strip of fabric tucked inside the garment. These clues help you follow the original construction rather than sewing a new line that pulls the garment out of shape.
If the opening is at a point that bears strain, such as an underarm or the join between a sleeve and body, check a little beyond the visible gap. Stitches may be loose just outside it. Include the weak section in your repair, but avoid sewing through fabric that is badly worn. For a valuable garment, a delicate material, or a tear that keeps spreading, a tailor or clothing-repair specialist can advise you on a more durable approach.
2. Gather a few simple tools
You do not need a sewing machine for a modest opening. Put the garment, a hand-sewing needle, matching thread and small scissors on a clear surface. A needle threader can help if the thread is fine, and a pin or two can hold the seam edges in place. A thimble is useful if the fabric is dense enough to make pushing the needle uncomfortable.
Choose a needle that passes through the cloth without leaving an obvious hole. A fine woven shirt will generally suit a finer needle than sturdy denim. Match the thread as closely as you can to the garment’s colour and weight; ordinary all-purpose sewing thread is a useful starting point for many everyday woven clothes. If you have a fabric scrap or a hidden seam allowance, try a few stitches there first to see how the needle and thread behave.
Use good light. A table lamp directed at the seam makes it easier to see the weave and the old stitch line, especially on dark cloth. Keep the garment lying flat, with the wrong side facing you, so you can work without twisting the area.
3. Prepare the fabric before sewing
Brush away loose lint and trim only dangling thread ends that are clearly separate from the fabric. Do not cut into the cloth or remove sturdy stitches that still hold the seam. If the seam allowance has folded or curled, ease it back into its original position with your fingers.
Line up the two edges as they sat before the seam opened. Match any visible pattern, stripe or edge, and check that the garment is not puckered. Use pins placed across the seam, away from the section where the needle will enter, or hold the layers with your fingers as you work. The aim is to keep the edges aligned without stretching them.
Say you find a small opening at the side seam of a cotton shirt, with the original edges intact and the stripe continuing across the join. You would turn the shirt inside out, align the stripes and old stitch line, then pin the layers just beyond the opening. As you sew, the stripe should meet neatly at the seam instead of shifting into a visible step.
4. Thread the needle and anchor the start
Cut a manageable length of thread rather than using a very long strand that can knot as you work. Thread the needle and tie a small knot at the end. If you prefer a doubled thread for extra strength, bring the two ends together and knot them; for fine fabric, a single strand may make a less bulky seam. Choose what sits neatly in the cloth.
Begin slightly before the opening, where the original seam still looks secure. This lets the new stitches overlap sound stitching instead of relying on a knot right at the weak edge. Bring the needle through from the wrong side so the knot stays inside. Take a small stitch, then another through the fabric just beyond it. Keep the knot close to the cloth, but do not pull so hard that it puckers.
If the fabric has a clear line of old needle holes, use them where practical. They offer a guide and avoid making an unnecessary row of holes. Where the old holes have widened, place the needle in sound fabric close to the seam line instead.
5. Close the gap with small, even stitches
For a basic hand repair, use a small backstitch. Work along the seam from the secure section towards the other side of the opening. Bring the needle up through the cloth, then take it back into the previous stitch area and bring it up a short distance ahead. Each new stitch reaches back to meet the last one, creating a connected line that is sturdier than a row of widely spaced running stitches.
Keep the stitches close enough to hold the seam edges together, but do not crowd them so tightly that the fabric bunches. Aim to catch both layers near the original seam line. After a few stitches, pause and check the right side of the garment. The seam should lie flat, and the fabric should not draw into a ridge.
At the far end, continue a little into the intact seam, just as you did at the start. That overlap helps the repair blend into the existing stitching. If the opening is longer than expected, keep the same steady rhythm rather than taking large stitches to finish quickly. Large gaps between stitches can leave the seam vulnerable to opening again.
6. Finish the thread without a bulky knot
When you reach the secure end, make a small finishing knot on the wrong side. One simple method is to take a tiny stitch through the seam allowance, leave a small loop of thread, pass the needle through the loop and draw it snug. Repeat if the thread or fabric calls for a second knot, but avoid piling knots on top of one another.
For a flatter finish, pass the needle through the seam allowance for a short distance before trimming the thread. This hides the tail and keeps it from sitting against the skin. Cut the thread close to the cloth without nicking the fabric. Turn the garment right side out and smooth the seam with your fingers.
Do not yank the thread tight to make the repair look extra secure. The stitches should hold the layers together while allowing the seam to move naturally. A tight, puckered line can be uncomfortable and may put more strain on the cloth beside the repair.
7. Inspect the repair before wearing the garment
Look at the seam from both sides. On the outside, check for puckers, a visible gap or a line that wanders away from the original seam. Inside, check that the thread ends are secure and that no sharp pin remains. If the seam looks uneven, you can remove a few stitches carefully and redo that section rather than pulling the thread hard to force it flat.
Gently flex the garment around the repaired area. You are checking that the seam moves without opening, not trying to stretch it to its limit. If the fabric pulls apart beside your stitches, the surrounding cloth may be too weak for this simple repair. Stop before the tear grows and consider adding a suitable reinforcement or asking a mender for help.
When the repair looks sound, follow the garment’s care instructions and handle the area gently the first time you wash it. A quick glance at the seam afterwards can tell you whether the stitches are sitting well. If the opening returns, inspect the thread and fabric together: the cause may be a loose finish, but repeated splitting can also point to worn cloth or strain on that part of the garment.